Use DBOS With Supabase
To learn more about how DBOS and Supabase are working together, check out this blog post!
- Develop Locally
- DBOS Cloud
Here's how to connect your DBOS application running on your computer or cloud environment to your Supabase.
1. Set up a Local Application
If you haven't already, follow the quickstart to set up a DBOS application locally. The rest of this guide will assume you have a local application.
2. Connect to Your Supabase Database
Next, open your Supabase dashboard at supabase.com/dashboard, select a project, and click "Connect" to retrieve connection information for your Supabase database.
You should see a screen that looks like this, showing the connection string for your database:
Make sure your connection method is set to "Direct connection" (if your database supports it) or to "Session pooler".

When you are ready, copy the connection string (filling in your Supabase password) from the dashboard and set the DBOS_SYSTEM_DATABASE_URL environment variable to it:
export DBOS_SYSTEM_DATABASE_URL="<your connection string>"
3. Launch Your Application
Now, launch your DBOS application. It should successfully connect to your Supabase database, printing your masked Supabase database URL on startup.
After connecting your DBOS application to Supabase, you can use the Supabase console to view your DBOS system tables. Open the "Table Editor" tab in the Supabase console. For your schema, select "dbos". You can now see DBOS durably checkpoint your workflows to your Supabase database:

Here's how to connect your DBOS application running on DBOS Cloud to your Supabase.
1. Connect to Supabase
Visit https://console.dbos.dev/provision and click "Connect Supabase" to connect your DBOS and Supabase accounts.

After connecting your Supabase account, you should see a list of your Supabase projects. Choose one to use with DBOS. When prompted, enter your Supabase database password (you set this when you created your Supabase project, if you forgot it you can reset it from your Supabase dashboard).

Congratulations! You've linked your Supabase project to DBOS. Now, let's deploy a DBOS app to your Supabase database.
2. Select a Template
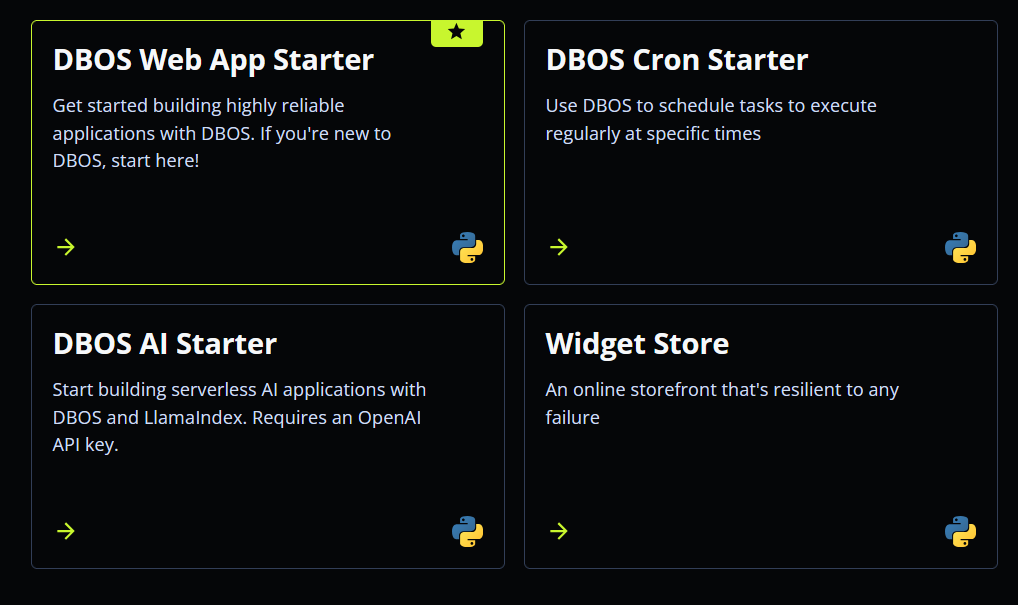
Visit https://console.dbos.dev/launch. At the top of the page, make sure your Supabase database instance is selected.

Then, choose a template you'd like to deploy.
Not sure which template to use? We recommend the DBOS Web App Starter.

3. Connect to GitHub
To ensure you can easily update your project after deploying it, DBOS will create a GitHub repository for it. You can deploy directly from that GitHub repository to DBOS Cloud.
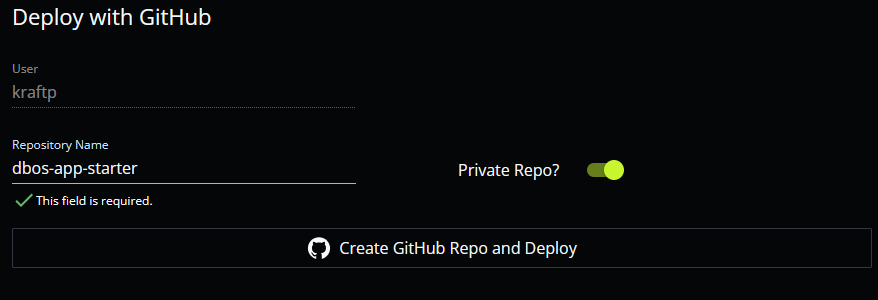
First, sign in to your GitHub account. Then, set your repository name and whether it should be public or private.

4. Deploy to DBOS Cloud
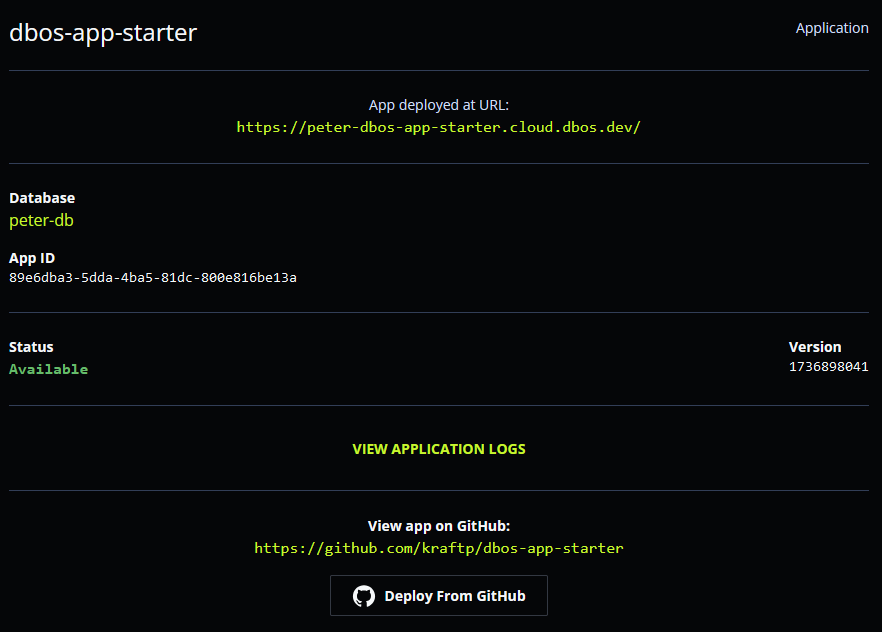
Click "Create GitHub Repo and Deploy" and DBOS will clone a copy of the source code into your GitHub account, then deploy your project to DBOS Cloud. In less than a minute, your app should deploy successfully.
Congratulations, you've successfully deployed an app to DBOS Cloud and Supabase! Click the URL on your application page to see your application live on the Internet.

To start building, edit your application on GitHub (for the web app starter, source code is in app/main.py), commit your changes, then press "Deploy From GitHub" to see your changes reflected in the live application.
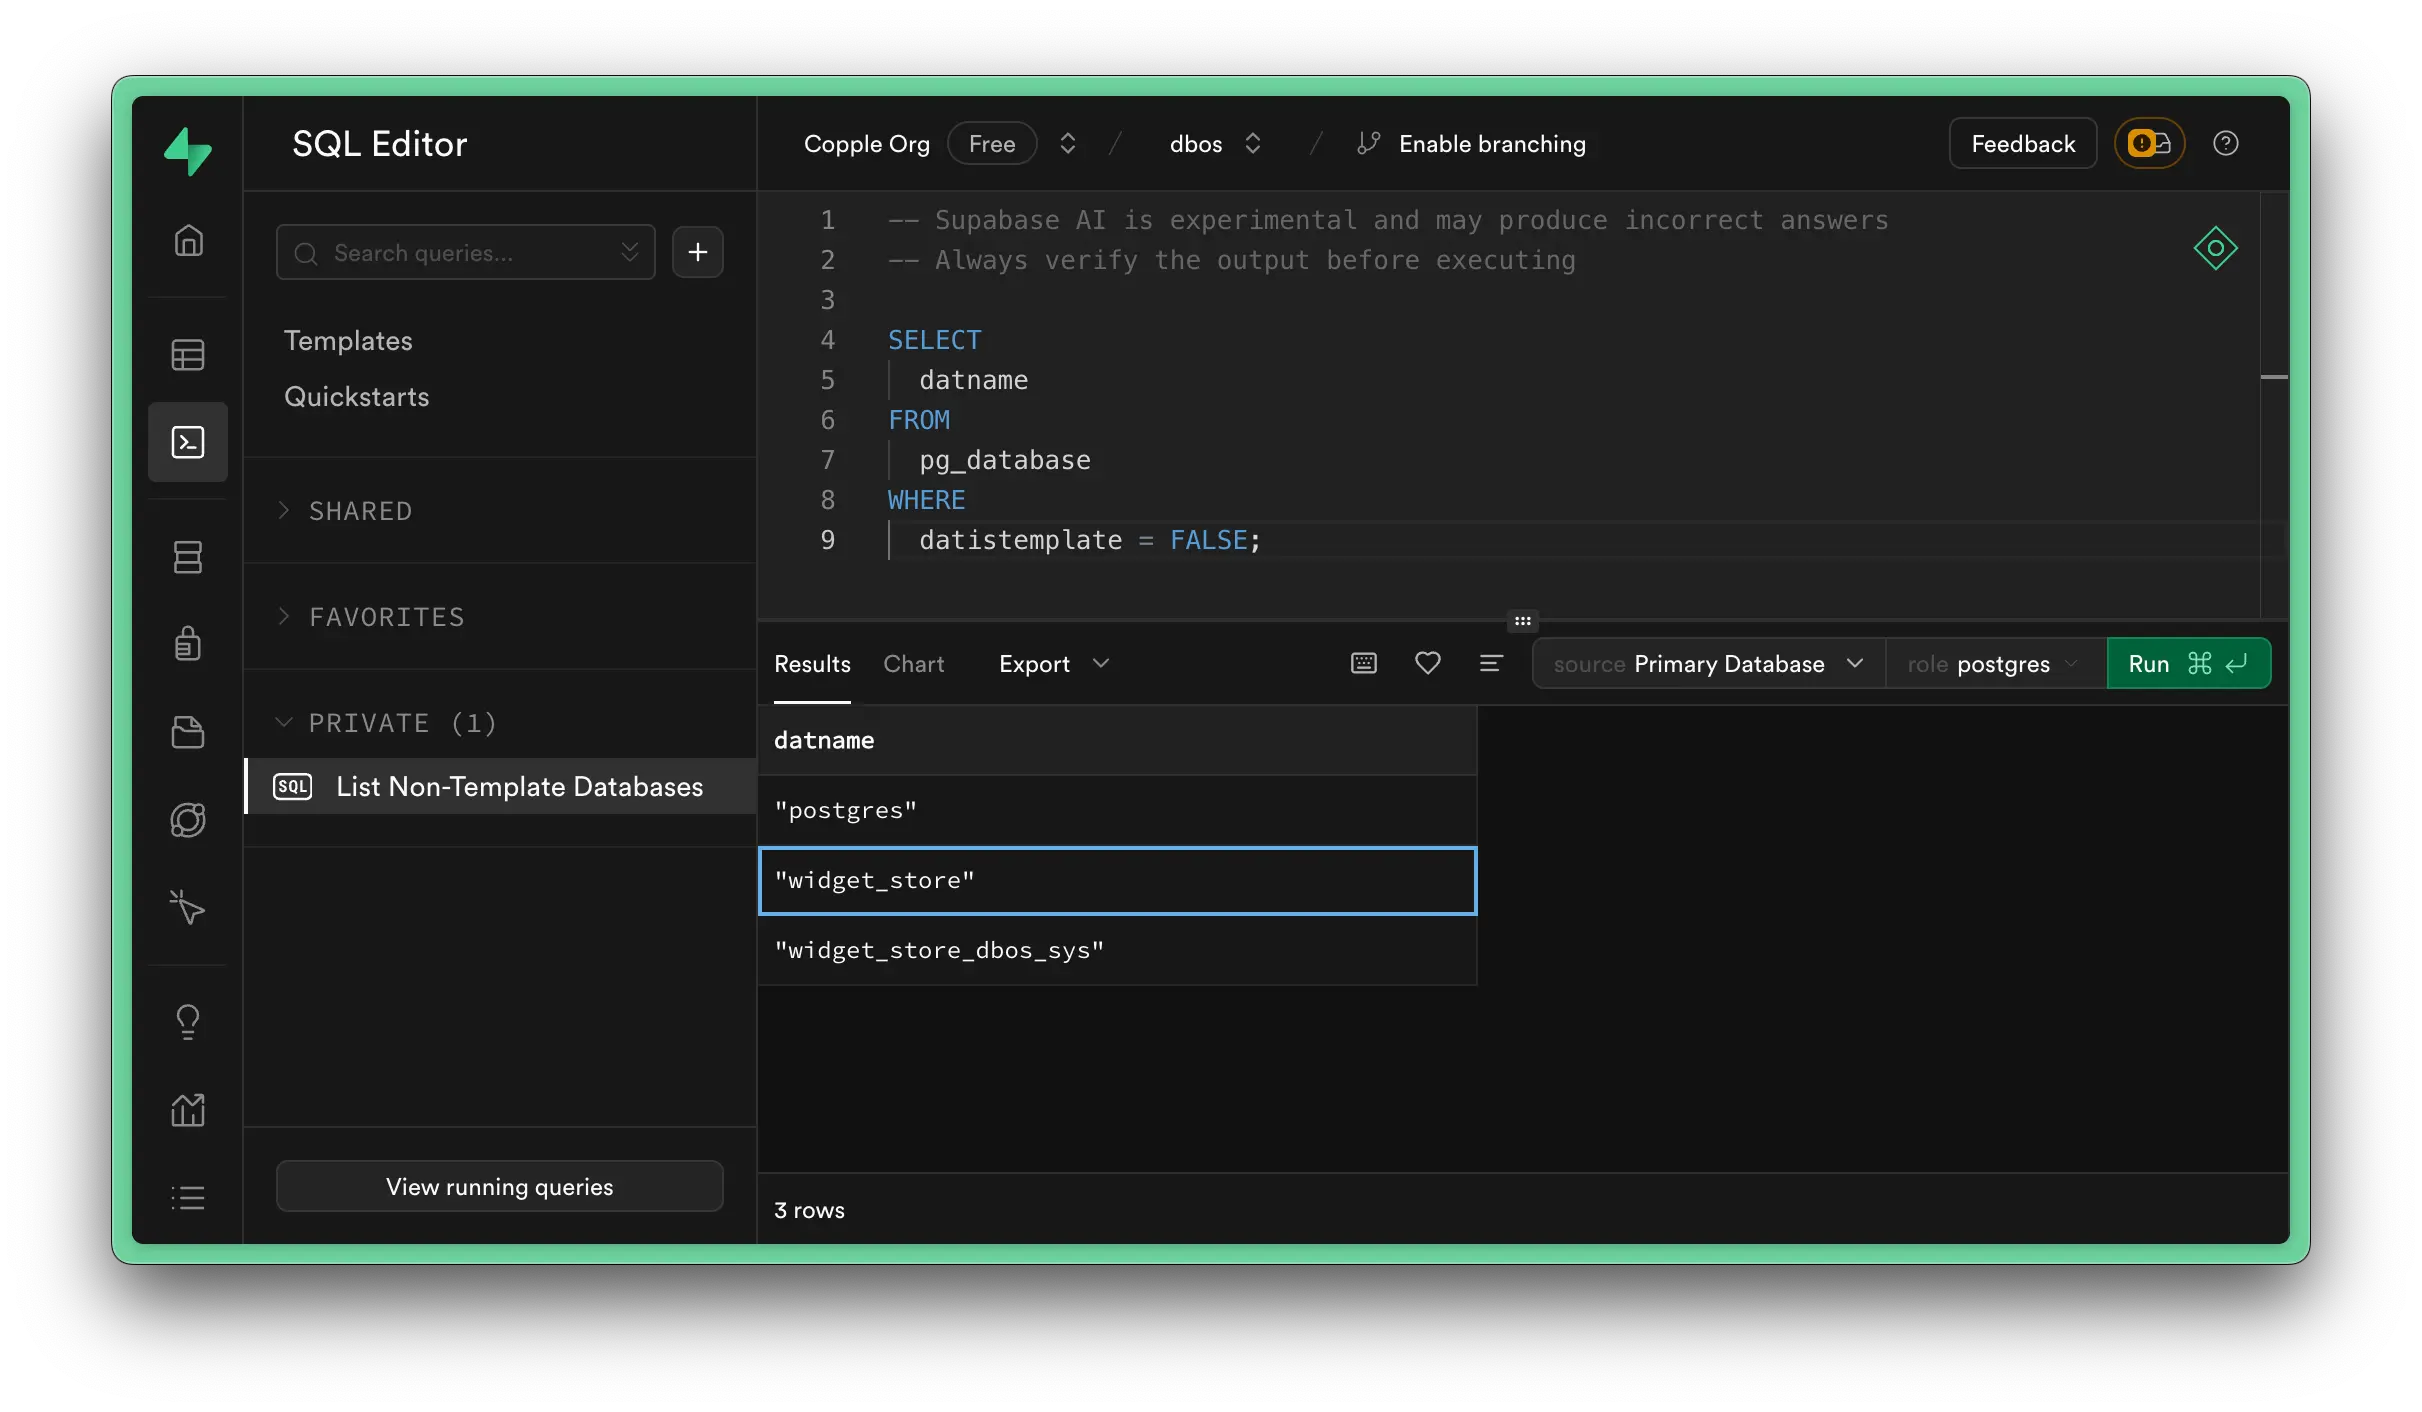
For isolation, DBOS deploys applications to non-default databases on your Supabase Postgres server. As a result, they aren't visible in the Supabase web UI. You can see the DBOS tables by running SQL queries in the Supabase web console:
